
Smart Auto Tool has come with a brand new add-on called Auto Post. This add-on has two great features. WordPress Blog Post is one of them. WordPress blog post will allow you to post new posts on user-specified social media. Here we are going to show you how to share WordPress blog post to social media.
To get started with Wordpress blog post, you've to add the Wordpress blog URL. Click on the Social Posting menu in the dashboard. It will take you to an interface. Find out Auto post section there. Check out the screenshot below:

Click on the Actions button. It will pop up a menu box. Now click on the Wp feed post link from there. Follow as you see on the following screenshot:

Now you will get another interface as seen on the screenshot below. Click on the Add new wordpress blog button.

This time it will open up a modal asking for Feed Name and WordPress blog URL. Fill in the two fields. You can put a name for the Feed name. Select the blog URL from the dropdown. Note that blog URL comes from Social Apps > Wordpress (self-hosted) this section in the dropdown. So you need to set up that first. So do it.

Once you've done, close the modals. After that the page will automatically be refreshed and you will see the Wordpress blog has been added.


Now it's time to tell the system on which social media your blog posts will be published. To do that click on the Actions button and then click on the round (grear-icon) Settings button as the red-marked arrow indicates on the following image.
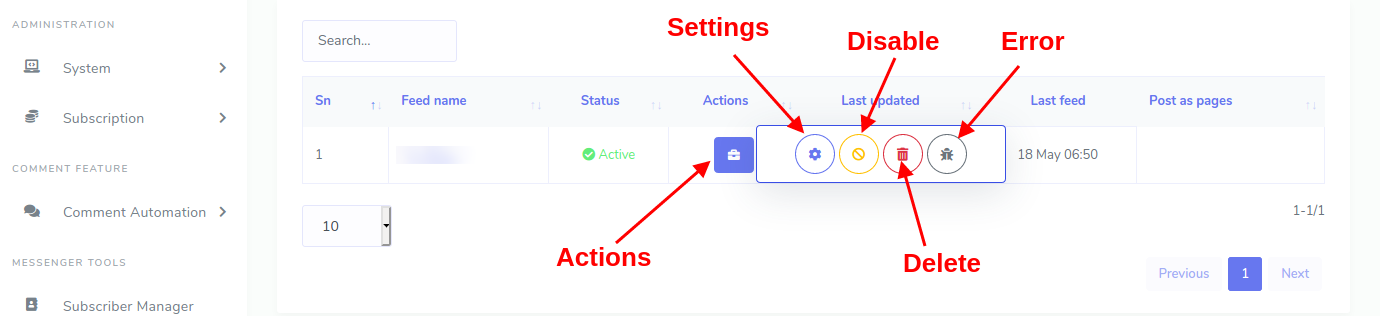
It will open up an modal from where you can specify social media, time zone, time range, and default meesage for your blog posts to be published. So set up those things as you need. Finally save those settings by clicking the Create Campaign button. And you are done!
There are other options there too. You can tell the system not to publish posts anymore on social media by clicking the Disable button, though you will be able to enable it again. You can check out the error log by click the Error button, and you can delete the blog settings by clicking the Delete button.

0 Comments
Leave a comment
Login to comment